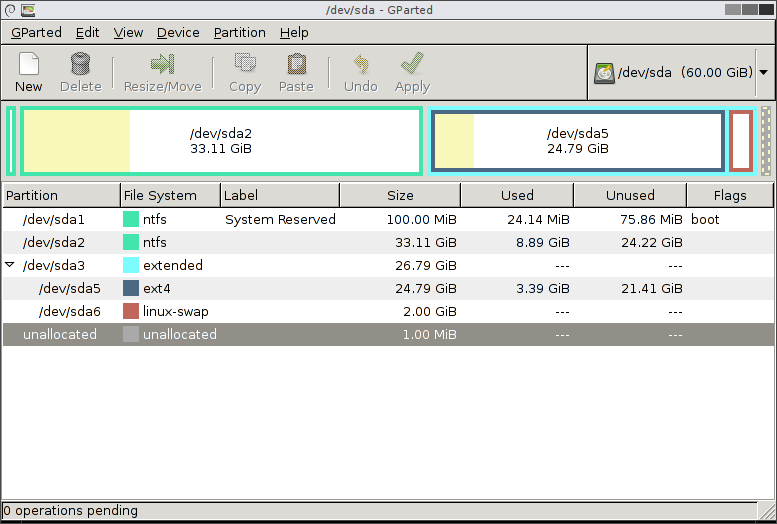
This has happened to me several times, I thought that 20gb would be enough for my Linux virtual machine, but I was so wrong. No problem, just expand the hard drive from the VM manager and then resize the partitions using GParted. Right? Wrong!
As M1k3y would say:Relax! It is actually quite simple."When in danger, when in doubt, run in circles scream and shout!"
- Download a liveCD iso of GParted
- Change VM disk settings so that the iso is in the CD drive and the CD drive is connected at power on.
- Use the VM manager to first defragment the drive then expand it to the desired size.
- During BIOS screen use ESC key to select the boot device as the CD drive.
- Select all defaults as Debian boots off of the CD, then double click on the GParted icon to start.
- If your unallocated portion is immediately after your main root/boot partition then you're in luck! Click the partition, select resize & move, and drag the right side to fill up the unallocated portion.
- If however there is a partition between your old
/rootand your unallocated portion, you will have to move some stuff around. This is where it gets tricky. If you move/rootanywhere, then your computer will boot intogrub rescue>and you will have to boot the kernel manually and then reinstall grub.

Moving Stuff Around
All of these steps will cause GParted to warn you that your system will probably not boot when you restart. In fact, it definitely won't start because GRUB will have no idea where to find your/root partition. This will cause it to boot into grub rescue, which has just enough commands for you to find and set the root partition and manually boot the kernel. Then you can reinstall grub to make the changes permanent.
- To move partitions around, you can copy and delete a partition to move it from the left side to the right side.
- For nested partitions, like and extended linux-swap, you can select resize & move to drag the boundary of the extended partition as far into neighboring unallocated portion as you can, then select resize & move again for the linux-swap partition and move it as far into the extended partition as possible and finally drag the opposite side of the extended partition against the linux-swap so that it is the same size as it was originally, but in a new location on the drive.
- Finally, now that your unallocated portion is next to the
/rootpartition, resize it to fill the entire drive.
Booting Kernel Manually from GRUB
There are several good references, including several askUbuntu and *Nix StackExchange, but this article by Carla Schroder from the Linux Foundation is superb. The GRUB 2.00 manual is also actually quite helpful if you know where to look. Try section 4.3.-
You can use
lsto see what drives GRUB sees.grub rescue> ls (hd0) (hd0,msdos3) (hd0,msdos5) (fd0)
GRUB tells you it sees your hard drive, 2 partitions: /dev/sda3 and /dev/sda5 and a floppy drive. - List the contents of each drive to find the one with
/boot. You can drop off themsdosprefix and just use the partition number.grub rescue> ls (hd0,3)/ ./ ../ boot/ etc/ bin/ sbin/ vmlinuz initrd.img ...
You just repartitioned your drive so you already new you moved your root from sda1 to sda3 (for example), so this is just validation. Note the trailing slash/, without it GRUB tells you what type of filesystem it is, eg ext4. - List the contents of
/bootand you will see all of the kernels available.grub rescue> ls (hd0,3)/boot ./ ../ grub/ vmlinuz-3.13.0-30-generic initrd.img-3.13.0-30-generic abi-3.13.0-30-generic System.map-3.13.0-30-generic vmlinuz-3.13.0-36-generic ...
Some Linux distros put a symlink to the linux kernel and ramdisk (initrd) in root which you can use to load them. - Set the root and prefix variables and load the normal module.
grub rescue> set root=(hd0,3)
grub rescue> set prefix=(hd0,3)/boot/grub
grub rescue> insmod normal
grub rescue> set
root=hd0,msdos3
prefix=(hd0,msdos3)/boot/grub
- Load the linux kernel specifying the location of root, load the ramdisk image initrd.img and boot.
grub rescue> insmod linux
grub rescue> linux /vmlinuz root=/dev/sda3
grub rescue> initrd /initrd.img
grub rescue> boot
Your machine should boot up. If it boots up but crashes with can't find/etc/fstab,/dev,/sys,/procand/sbin/initerrors and ends up in BusyBox with a(initrmfs)prompt, then you forgot to specify the location of root! - Now for the crucial step, as if everything else wasn't enough, right? Everything you do in GRUB is temporary. In order to fix GRUB you will have to reinstall it. Open a Bash terminal and execute
update-gruband thengrub-installand you are good to go.$ update-grub Generating grub configuration file ... Found background: /usr/share/images/grub/Apollo_17_The_Last_Moon_Shot_Edit1.tga Found background image: /usr/share/images/grub/Apollo_17_The_Last_Moon_Shot_Edit1.tga Found linux image: /boot/vmlinuz-3.13.0-29-generic Found initrd image: /boot/initrd.img-3.13.0-29-generic Found linux image: /boot/vmlinuz-3.13.0-27-generic Found initrd image: /boot/initrd.img-3.13.0-27-generic Found linux image: /boot/vmlinuz-3.13.0-24-generic Found initrd image: /boot/initrd.img-3.13.0-24-generic Found memtest86+ image: /boot/memtest86+.elf Found memtest86+ image: /boot/memtest86+.bin done $ grub-install /dev/sda Installing for i386-pc platform. Installation finished. No error reported.
Note that you are installing GRUB on the hardrive, /dev/sda, not into any partition, so don't use a partition number. Reboot again with your fingers crossed, but you should be back in familiar territory.

No comments:
Post a Comment